Fluent Forms is a powerful WordPress form builder plugin that aims to provide users with a seamless form-building experience. The plugin is designed to be beginner-friendly, yet packed with features that can cater to the needs of advanced users as well.
In this article, we will provide a comprehensive review of the Fluent Forms plugin, covering its features, ease of use, pricing, and customer support.
Features of Fluent Forms

Fluent Forms offers an impressive range of features that can help users create complex forms with ease. Some of the key features include:
Drag and drop form builder
The drag-and-drop form builder allows users to create forms effortlessly, without the need for any coding skills.
Pre-built templates
Fluent Forms offers a range of pre-built templates that can be customized to suit your specific requirements.
Conditional logic
This feature enables users to show or hide specific fields based on the user’s response to previous questions, making forms more intuitive and user-friendly.
Multi-page forms
Users can create multi-page forms that can help break down complex forms into smaller sections, reducing the chances of form abandonment.
Advanced fields
The plugin offers advanced fields such as file upload, signature, and date picker, making it easier to collect more detailed information from users.
Integration with third-party apps
Fluent Forms integrates seamlessly with a range of third-party apps such as Mailchimp, Zapier, and PayPal.
Ease of Use
One of the standout features of Fluent Forms is its ease of use. The plugin is designed to be beginner-friendly, and the drag-and-drop form builder makes it easy for users to create forms without any coding skills. The pre-built templates also make it easy to get started, and users can customize the forms as per their specific requirements.
Pricing
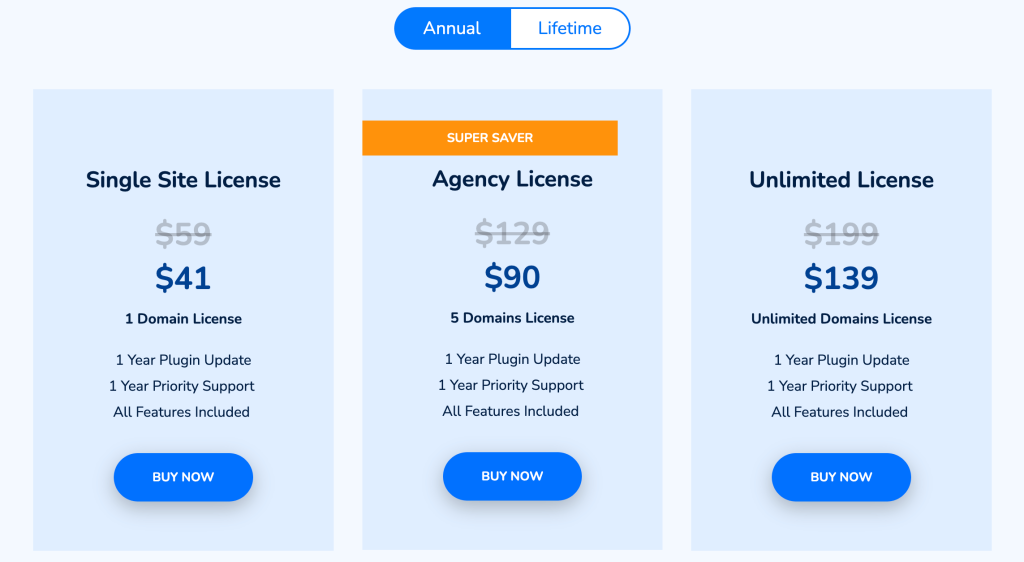
Fluent Forms offers three pricing plans – Personal, Business, and Developer. The Personal plan costs $59/year and allows users to use the plugin on one site, while the Business plan costs $129/year and allows users to use the plugin on up to five sites. The Developer plan costs $259/year and allows users to use the plugin on unlimited sites, making it ideal for agencies and freelancers.
Customer Support
Fluent Forms offers comprehensive customer support, including a detailed knowledge base and a support forum. Users can also submit support tickets if they require assistance with any issues. The plugin’s developers are also active on social media platforms such as Twitter, providing users with additional support and updates.
Fluent Forms Pros and Cons
Ratings(4.6 out of 5 stars) | 94% | ||
Ease Of Use 95% Design 90% Setting 90% Price 95% Support 100% Overall Quality 94% | Pros
Cons
| ||
Make your WordPress forms with Fluent Forms
Creating your first form with Fluent Forms is a simple and straightforward process. Here’s a step-by-step guide to help you get started:
Step 1: Install and Activate the Fluent Forms

The first step is to install and activate the plugin on your WordPress website. You can do this by going to the WordPress dashboard, selecting ‘Plugins’, and then clicking on ‘Add New’. Search for ‘Fluent Forms’ and click ‘Install Now’. Once the installation is complete, click on ‘Activate’.
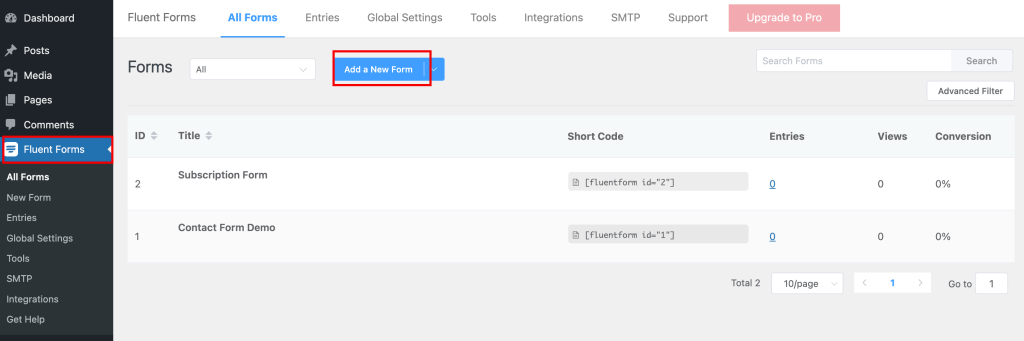
Step 2: Create a New Form
Once the plugin is activated, you can create a new form by clicking on the ‘Fluent Forms‘ tab in the WordPress dashboard and selecting ‘Add New‘. Give your form a name, and then choose a template or start from scratch.
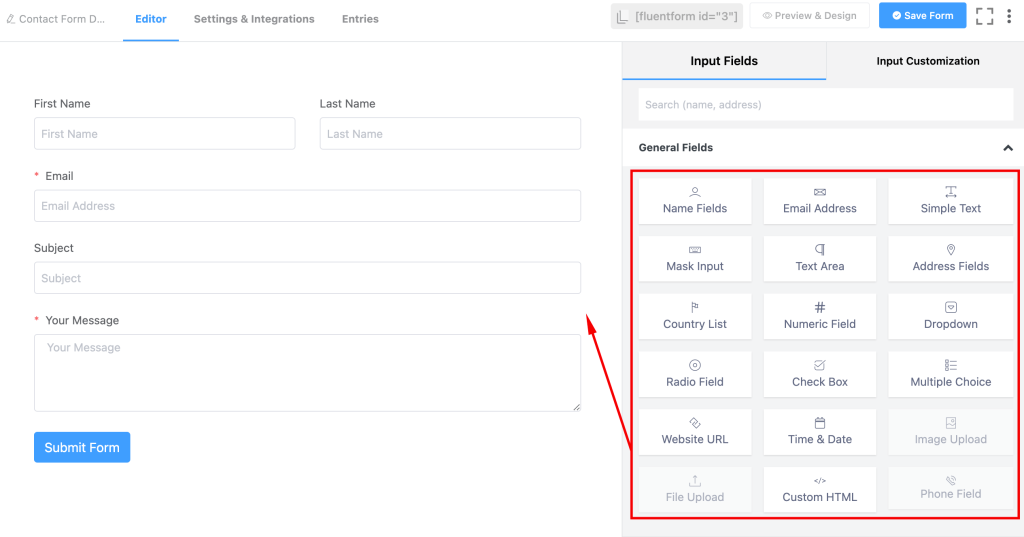
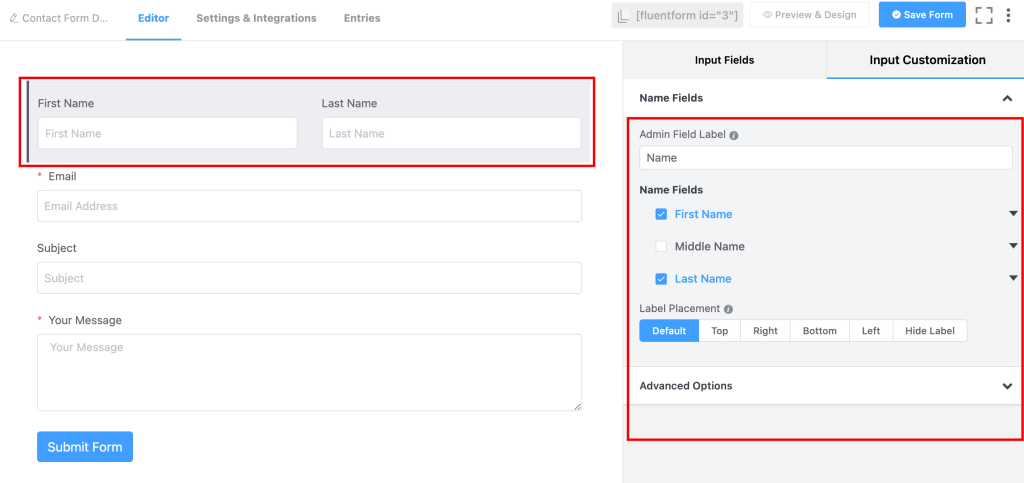
Step 3: Add Fields to the Form
After creating the form, you can start adding fields to it. To add a field, simply drag and drop it from the left-hand side of the screen onto the form. You can add various types of fields such as text fields, dropdowns, radio buttons, checkboxes, and more.
Step 4: Configure Field Settings
After adding the fields to the form, you can configure their settings. Click on the field to open its settings and make changes as per your requirements. You can set validation rules, add placeholder text, and choose whether the field is required or optional.
Step 5: Customize the Form
Once you’ve added the fields and configured their settings, you can customize the form’s appearance. Click on the ‘Customize‘ tab to access the customization options. Here you can change the form’s color scheme, add a background image, and adjust the spacing and layout of the form.
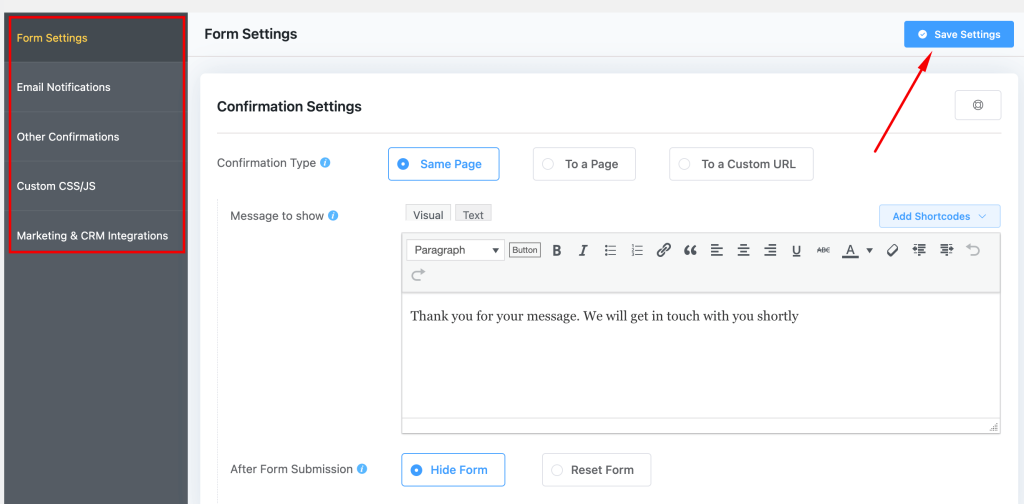
Step 6: Configure Form Settings
After customizing the form, you can configure its settings by clicking on the ‘Settings‘ tab. Here you can set up email notifications, configure the form’s confirmation message, and enable anti-spam protection.
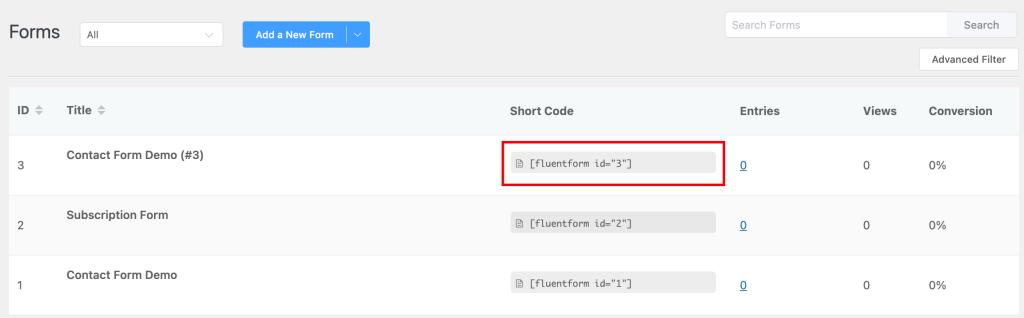
Step 7: Publish the Form
Once you’ve completed all the steps above, you can publish the form on your website. To do this, simply click on the ‘Save‘ button at the top of the screen. Now, you can then copy the shortcode provided and paste it onto the page or post where you want the form to appear.
In conclusion, creating your first form with Fluent Forms is a quick and easy process. By following the steps outlined above, you can create a professional-looking form that is tailored to your specific requirements. With Fluent Forms, you can create complex forms with ease, and customize them to match your brand’s style and personality.
Conclusion
Overall, Fluent Forms is an impressive WordPress form builder plugin that offers a range of features to help users create complex forms with ease.
The plugin’s ease of use and range of pre-built templates make it an ideal option for beginners, while the advanced features such as conditional logic and integration with third-party apps cater to the needs of advanced users.
The pricing plans are also reasonable, and the comprehensive customer support ensures that users can get assistance whenever they require it. If you’re looking for a powerful form builder plugin for WordPress, Fluent Forms is definitely worth considering.